Implementing a P2S VPN in the Azure Portal
- If you have successfully run the PowerShell script, all resources will be deployed. Navigate to the Azure portal and search for Virtual Network Gateways. Open the Virtual Network Gateways blade and select the gateway you created.
- Go to the Point-to-Site configuration blade and click Configure Now.
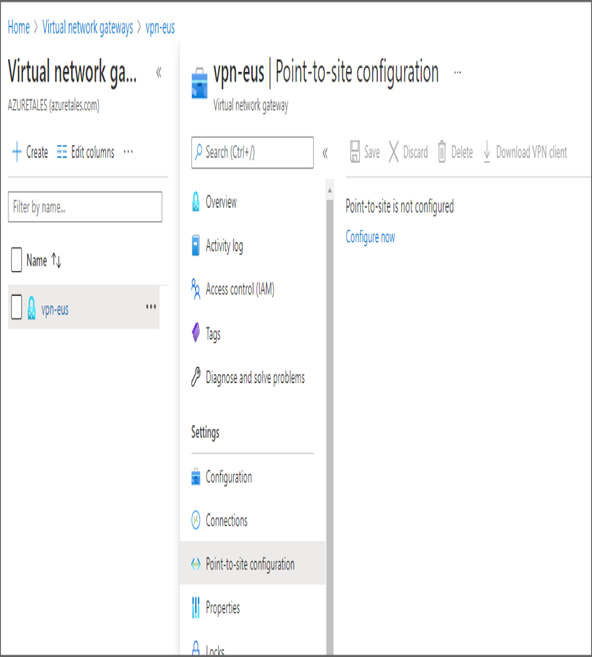
- The configuration window will come up with the fields to input the following values:
a. Address pool: The pool from which addresses will be allocated to the P2S-connected clients. Let’s set the value as 172.16.1.0/24.
b. Tunnel type: You can choose OpenVPN or SSTP or IKEv2 protocols or any of their combinations. We will go with OpenVPN (SSL) here.
c. Authentication type: You can configure multiple authentication types such as Azure AD, Azure certificates, and RADIUS authentication. If you are planning to use certificates, then you need to generate the certificates and upload them to Azure. In this exercise, you will use Azure AD as it will be easy to leverage SSO and connect to VPN. You need to provide the tenant information and grant admin consent. If you are not the global administrator of the tenant, then you cannot grant the access. You need to provide the following information:
d. Tenant: The endpoint should be added in the format https://login.microsoftonline.com/{tenantId}. You need to replace the {tenantId} with your tenant ID.
e. Audience: Since you are using Azure public, the audience is 41b23e61-6c1e-4545-b367-cd054e0ed4b4.
f. Issuer: The issuer is https://sts.windows.net/{tenantId}. You need to replace {tenantId} with your tenant ID.
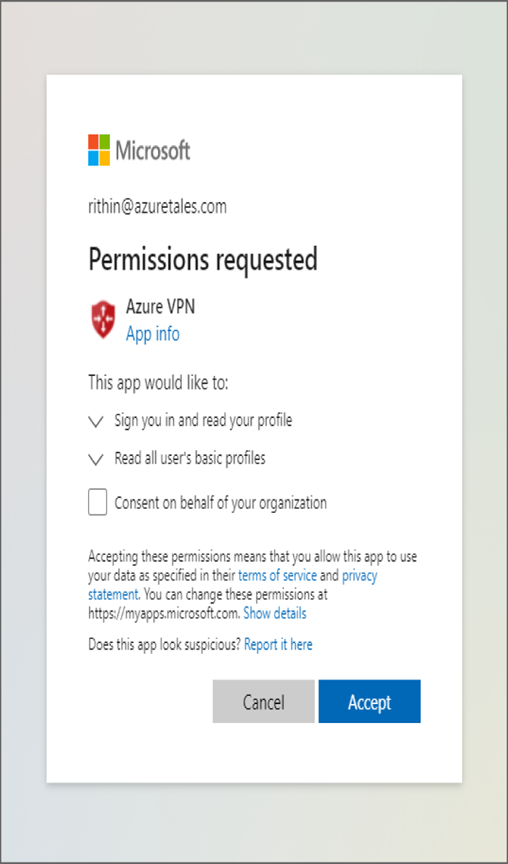
g. Click Grant Administrator Consent For Azure VPN Client Application, and you will be redirected to a window similar to the one in the following graphic. Sign in using your Global Administrator credentials, grant consent, and accept the permissions. Once the consent is granted, you will be redirected back to the Azure portal.
4. Once you fill in all the details, click Save to add the P2S configuration.
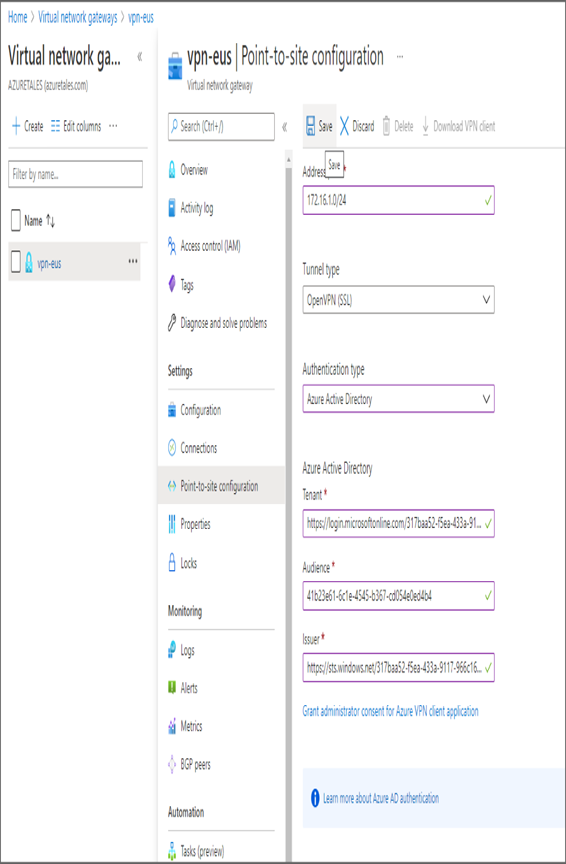
- After getting notification that the gateway configuration is saved, refresh the page. You will be able to see the Download VPN Client option is available. Click the download button and download the ZIP file. Extract the files to a directory. The ZIP will contain two folders, Generic and AzureVPN. These directories contain the VPN profile and certificates.
- Download and install the Azure VPN client from the Microsoft Store:
www.microsoft.com/en-us/p/azure-vpn-client/9np355qt2sqb - Open the Azure VPN client and add the profile using the Import option.
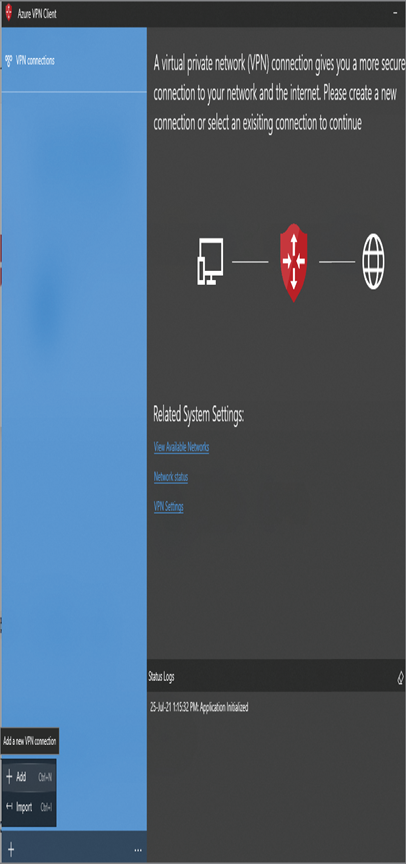
8. You will be asked to select the XML file that contains the VPN configuration. This file will be in your AzureVPN folder, named azurevpnconfig.xml. Selecting this file will import all the details.
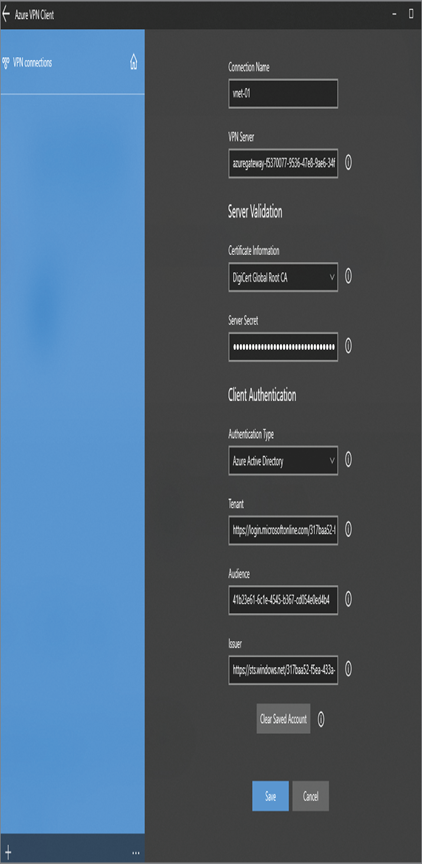
- Click Save to save the configuration. Your VPN connection will be listed on the left side of the Azure VPN client. Click the Connect button to connect to the VPN and establish a P2S connection.
- You will be asked to input the user credentials, you can use any user credentials from the tenant ID you have provided in the P2S configuration.
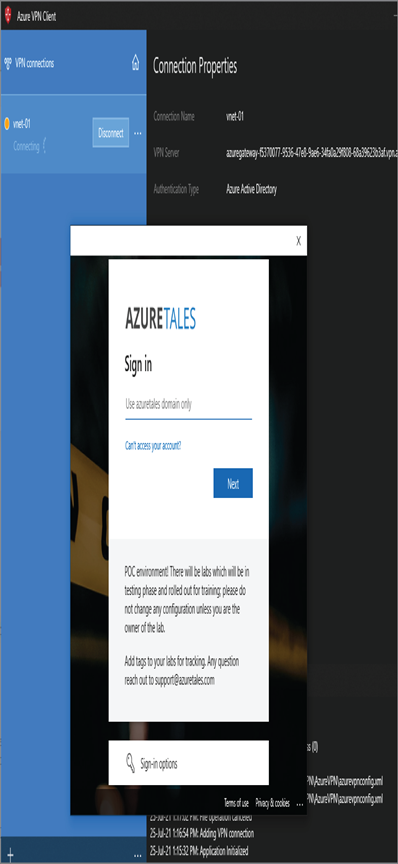
11. After authentication, you can see that the VPN is connected and the routes to virtual network are available to you. Let’s go ahead and check if you can connect to the VM in the workloadSubnet using the private IP address. Run a ping from your local computer to check the private IP address of the VM, and the ping will be successful.
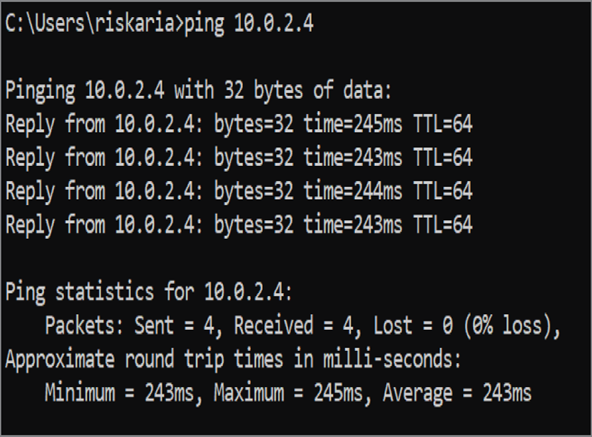
With that, you have successfully established a connection from your client machine to an Azure virtual network using a P2S connection. Now that you are familiar with the VPN connections, let’s go ahead and discuss ExpressRoute connections.
Leave a Reply