6. Once all details are filled in, click Next: Frontend IP Configuration to configure the front end.
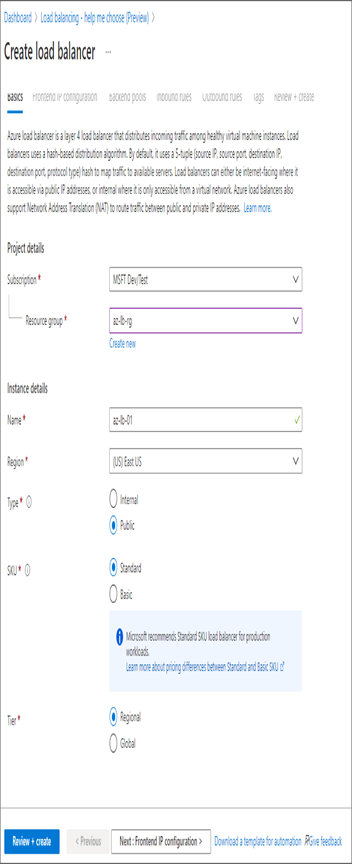
7. On the Frontend IP Configuration tab, click Add A Frontend IP and create a public IP address. You also need to pass the name, IP version, and IP type. You can add multiple front-end IPs if required.
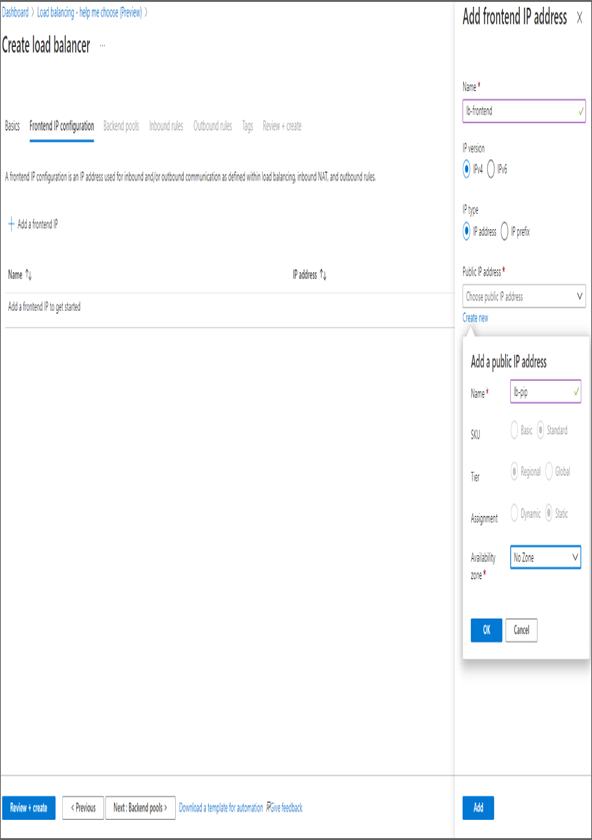
- After saving the IP configuration, click Next: Backend Pools to configure the backend pool. In the backend pool, click Add A Backend Pool, which will take you to a window where you can add the backend pool details.
- In the backend pool configuration, you need to input the following details:
- Name: This is the name for the backend pool.
- Virtual Network: Select the virtual network where your VMs are deployed.
- Backend Pool Configuration: NIC or IP address. Select the default value.
- IP Version: IPv4.
- Under Virtual Machines, click Add, and select all web servers and then Add.
- Finally, click Add at the bottom-left corner to save the backend pool configuration.
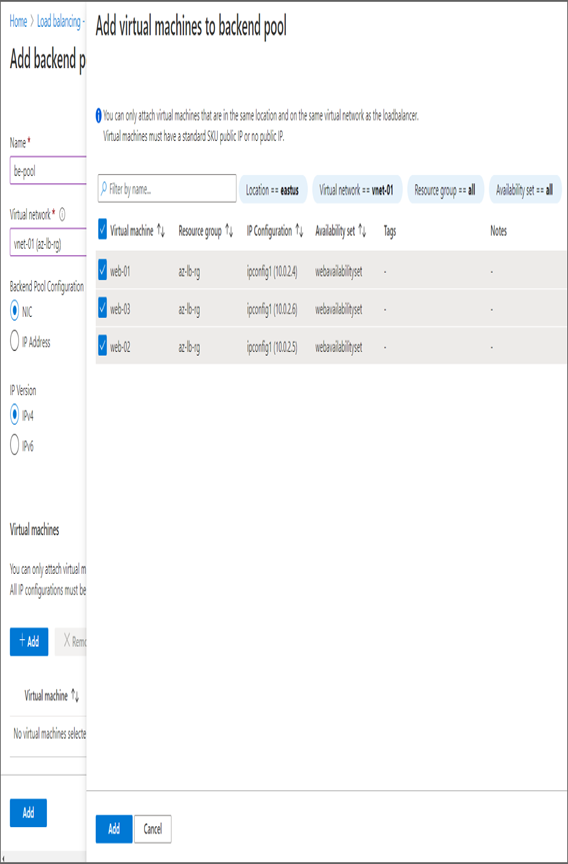
- Once you save the configuration, you will be redirected to the load balancer create wizard, and your VMs are visible on the Backend Pools tab. Click Next: Inbound Rules to configure the inbound rules.
- On the Inbound Rules tab, you are interested only with the load balancing rule, so click Add A Load Balancing Rule. On the right side, you will see a new pane to add the load balancing rule. You need to provide the following details:
- Name: This is the name for the load balancing rule. You can give any name.
- IP Version: IPv4.
- Frontend IP address: Select the frontend IP address you created earlier.
- Protocol: TCP, as you are planning to distribute web traffic.Port: 80 for web traffic.Backend
- Port: 80 as the Apache server is running on port 80 on the backend VMs.
- Backend Pool: Select the backend pool you added earlier.
- Health Probe: Since you haven’t created the health probe yet, you can click Create New. As shown here, you can add the health probe details. The details include the name, protocol, port number, internal, and unhealthy threshold.
- Session Persistence: When set to None, this will perform five tuple hash.
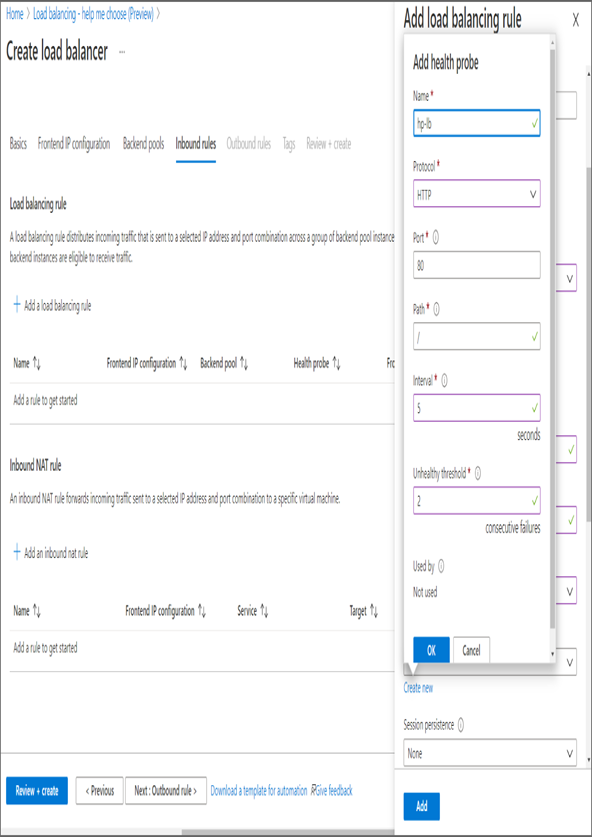
- Leave the rest of the options with the default value and click Add to add the load balancing rule. As you are not using any Outbound rules, you can skip that and click Review + Create. Once the validation is done, click Create to create the load balancer.
- Once the load balancer is deployed, navigate to the Overview blade, and copy the public IP address. Try the IP address in your browser; you can see here that you are getting responses from different servers.
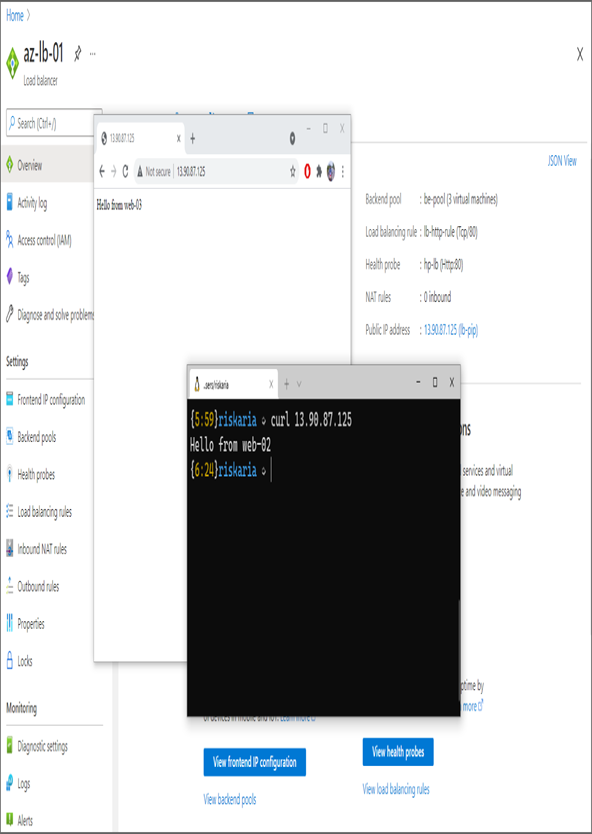
The responses in Exercise 5.1, step 13, have been taken from two different applications (one from the browser and the other from the terminal). Since you configured the load balancer session persistence as none, a five-tuple hash will take place. In a five-tuple hash, whenever one of the values changes, you will routed to another server. Here, the source port is different for these requests, and they have been routed to two different servers though they originated from the same source IP address.
On that note, you are concluding the Azure Load Balancer. In the next section, you will uncover Azure Application Gateway.
Leave a Reply